Slab slump mold/ Sgraffito


Coil pot


For the making of this piece, I started with wedging and slab rolling my clay, then I found a small bowl to slump my slab against. I smoothed my slab out on both sides with a rubber kidney and then left the slab to sit outside for a few minutes to harden up a little bit. Then I got my slab from outside and grabbed a thin and flexible piece of plastic. I then turned my small bowl upside down and smoothed the plastic over it. Then I laid my slab over the small bowl and used a knife to cut around the bowl rim in a circle. Then I used the rubber kidney along with water to smooth all the cracks and bumps and round the edges. Then I put it outside again for a few more minutes to harden further. Then I slowly shimmied the bowl off of the plastic without cracking it. Next, I underglazed the inside of the bowl with normal brush strokes, but on the outside I dabbed it on for a different texture. Then I used a small loop tool to carve a line pattern on the inside of it through the underglaze. After the piece was bisqued I glazed it with clear. I like the outcome of this piece, but I wish I did more intricate designs.
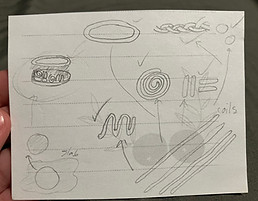
With this project, I started by wedging a big piece, and slab-rolling a smaller one. I used a knife to cut out a circle from the slab to be the base of my coil pot and then smoothed the edges of that circle. Next, I started to roll out coils to build up the walls of my pot, but a problem I ran into was that the clay was a little bit dry and kept cracking when I tried to bend it. So I ended up rolling them out to a log-ish length and width and then dipping them in water to continue rolling or pulling the coils longer (like the technique for pulling handles). I made my coils into squiggles, braids, swirls, lines, and dots. I scored and used a slip to add each coil. Once I built it up to a height I liked I added one long coil to the top to be the rim. Then I used a rubber kidney, water, slip, and my fingers to smooth out the inside and plug up any holes/leaks. Once the piece was bisqued I glazed it a turquoise color. I don't really love the way this project turned out, the rim is a bit uneven and I needed to have added another layer of glaze for it to be less streaky.
Darted Mug


Choice Project:


To start this project I wedged a very large piece of clay and slab rolled the whole thing. I used a rubber kidney and water to smooth out the whole slab and then used a ruler and knife to cut out a large rectangle. I then bent the slab into a circle and scored and slipped the edges together to make a cylinder. Then I used water and my fingers to smooth out the seam where the scoring had been and make it relatively unnoticeable. Next, I made four marks evenly spaced out on the top of the cylinder and cut out equal-sized triangles where each mark had been using a needle tool. Then I bent each of the four flaps/ sides into each other (scoring and slipping them together). Then I again used water to smooth out the seams on the inside and outside of the cup. Next, I traced the size of the bottom of the, now-darted, cup on another slab and cut out the square to attach to close the bottom. I trimmed it to the right side and then scored and slipped it onto the bottom, in the process creating a foot. Once the foot and inside of the cup were all smoothed out I smoothed out the top lip of the cup. Lastly, I cut a small strip from a slab, smoothed it out, and attached it to the cup as a handle. The piece was then bisqued and glazed purple. I am really proud of this project considering it was my first darted piece and it turned out really well.
For this project, I decided to make another darted cup, but this time adjusting the dimensions to make it slightly shorter, but also wider. I started by rolling a slab with my freshly wedged clay and smoothing out all the imperfections. Then I cut out the rectangle for my cup, a strip for the future handle, and another piece set aside for the bottom of the cup later on. I joined the rectangle into a cylinder once again and thoroughly blended the seam. This time I made my darts/ triangle cutouts slightly bigger to account for the wider cup. Once all the flaps/sides were properly blended and secure I added the bottom to create a foot and seal up the hole. Then I smoothed all the seams and edges on the inside and outside with water. Last but not least I used my previously set aside and smoothed strip to add a handle, this handle was longer than the one on my previous cup so I used a chunk of clay to use as a crutch for the handle until it was dry. I ended up glazing it with blue and green crystal glaze. I love this project, I had a lot of fun making it and it turned out just like I wanted. I think that I made significant progress from my first to second darted cup.


